Maps are an essential tool for visualizing data and displaying geographical information. With the advancement of technology, creating maps has become easier and more interactive. One such library that has gained popularity among web developers is the jQuery Mapael library. This library allows you to create realistic and interactive maps with just a few lines of code. In this blog, we will explore how to use the jQuery Mapael library to create stunning maps for your website.
What is jQuery Mapael Library?
jQuery Mapael is a JavaScript library that allows you to create interactive and responsive maps using SVG and VML. It is built on top of the popular jQuery library and uses Raphael.js to render the maps. The library comes with a wide range of features such as zooming, panning, tooltips, legends, and animations, making it a powerful tool for creating maps.
Getting Started
To get started with jQuery Mapael, you need to include the necessary files in your HTML document. You can either download the library from its official website or use a CDN link. Once you have included the files, you can start creating your map.
Installation
Copy the following scripts between <head> and </head> tags –
<script src="https://cdnjs.cloudflare.com/ajax/libs/jquery/3.1.1/jquery.min.js" charset="utf-8"></script>
<script src="https://cdnjs.cloudflare.com/ajax/libs/jquery-mousewheel/3.1.13/jquery.mousewheel.min.js" charset="utf-8"></script>
<script src="https://cdnjs.cloudflare.com/ajax/libs/raphael/2.2.7/raphael.min.js" charset="utf-8"></script>
<script src="https://cdnjs.cloudflare.com/ajax/libs/jquery-mapael/2.2.0/js/jquery.mapael.min.js" ></script>
<script src="https://cdnjs.cloudflare.com/ajax/libs/jquery-mapael/2.2.0/js/maps/world_countries.js" ></script>
Creating a Basic Map
To create a basic map using jQuery Mapael, you need to define a container element in your HTML document. This element will hold the map. Next, you need to initialize the map using the mapael() function and pass in the container element as a parameter. Finally, you can specify the map’s settings and data using the settings and data parameters, respectively.
Now add the following code in your <body> –
<div id="map"></div>
<script type="text/javascript">
$(function () {
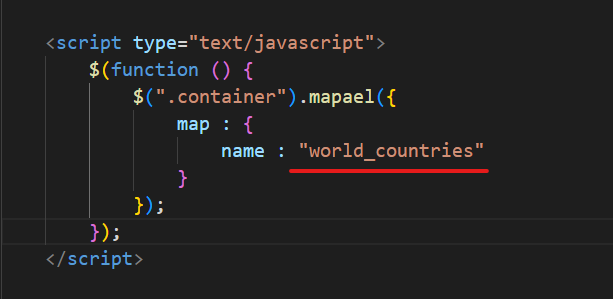
$("#map").mapael({
map : {
name : "world_countries"
}
});
});
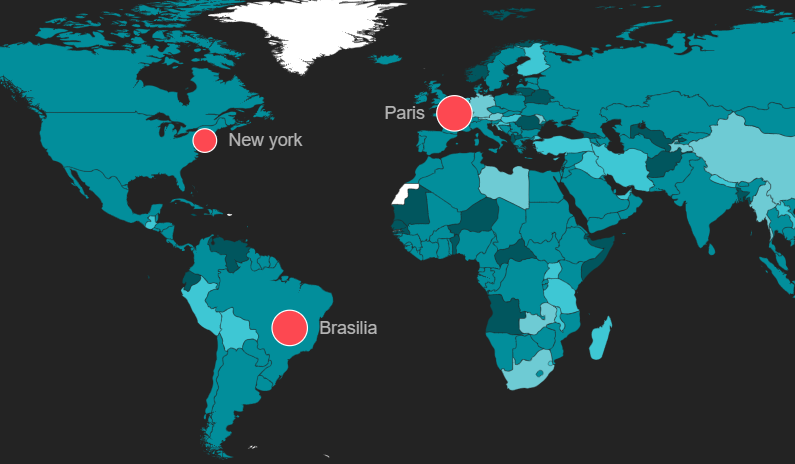
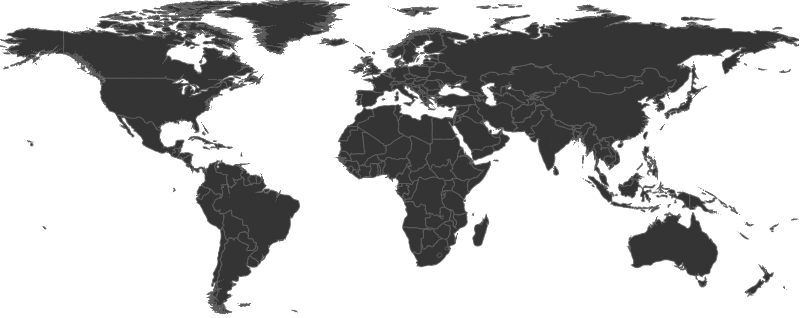
</script>This will create a basic map of the world that will look something like this –
If you want to display map of a particular country or Region, you can do that too simply by including the respective Js file and changing the name parameter in the map function as shown below –
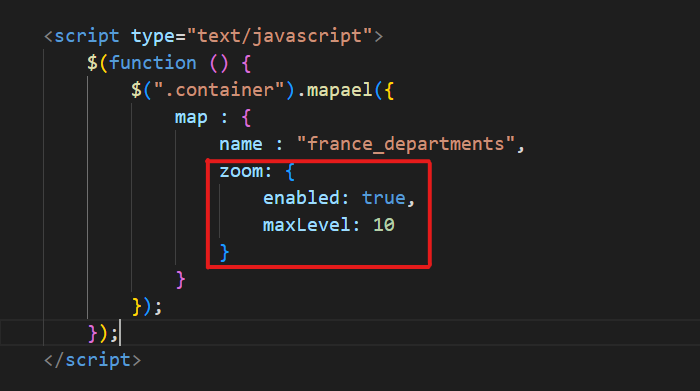
For instance, let’s assume you need to display map of france, all you have to do is
- Include the following js file in head
<script src=”https://rawgit.com/neveldo/jQuery-Mapael/2.2.0/js/maps/france_departments.js” ></script> - Change the name parameter from “world_countries” to “france_departments”
And Your new map will look something like this –

Similarly, you can create maps of any country you want.
Now, we’re done with the initial setup. Let’s move on customization of the maps.
Adding Interactivity
One of the main features of jQuery Mapael is its ability to add interactivity to maps. You can add tooltips, legends, and animations to make your map more engaging and informative.
Enable Zooming Controls in Map
You can enable zoom controls on the map as shown below –
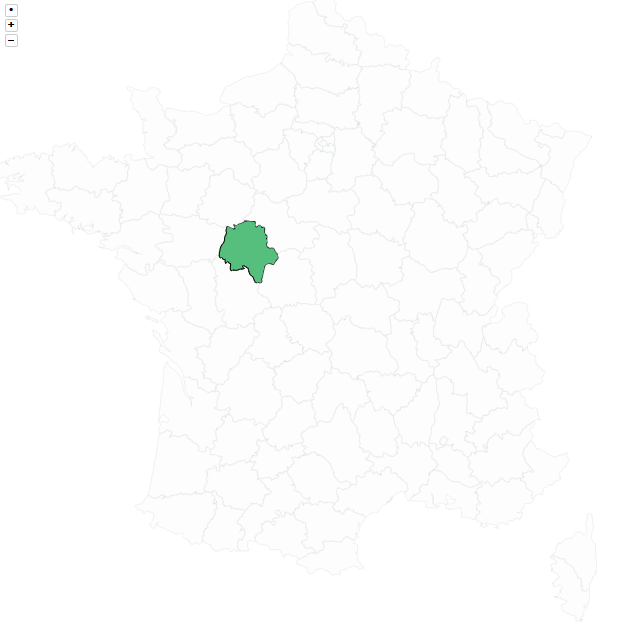
Customize the Appearance of Regions
We can change the appearance of regions in the map using the defaultArea parameter in function as shown below –
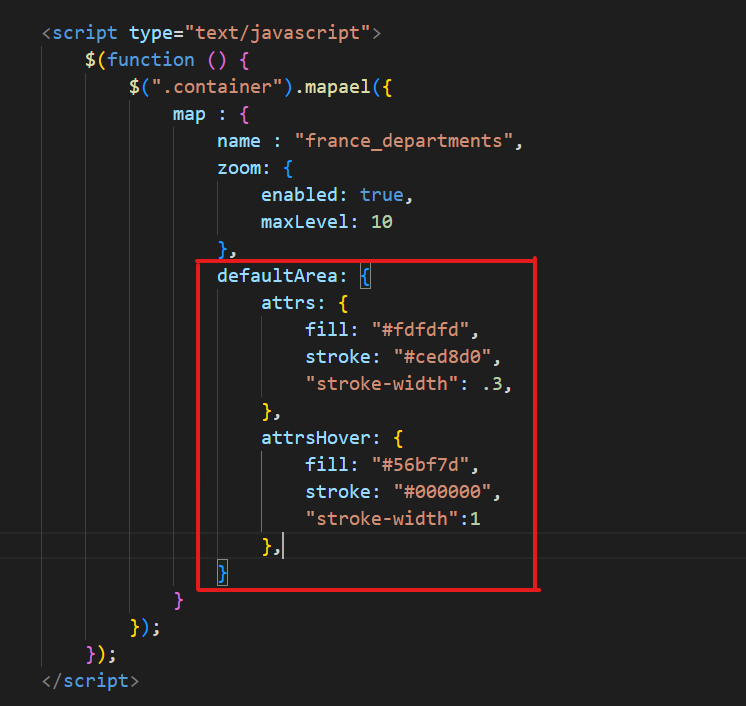
Now, our Map looks something like this –
Tooltips
Tooltips are small pop-up boxes that appear when you hover over an area on the map. They can display additional information about the area, such as its name or value. To add tooltips to your map, you need to specify the tooltip setting and its properties.
tooltip: {
  // Set the content of the tooltip
  content: function (data) {
    return data.name + ": " + data.value;
  }
}
Legends
Legends are used to explain the colors or values on the map. They can be added using the legend setting and its properties.
legend: {
  // Set the legend's position
  area: {
    // Specify the legend's horizontal and vertical alignment
    x: 10,
    y: 10
  },
  // Set the legend's labels
  labels: {
    // Specify the labels' colors and values
    colors: ["#ff0000", "#00ff00", "#0000ff"],
    values: ["High", "Medium", "Low"]
  }
}
Animations
Animations can be used to make your map more dynamic and engaging. You can add animations to your map using the anim setting and its properties.
anim: {
  // Set the animation's type
  type: "bounce",
  // Set the animation's duration
  duration: 1000
}
Customizations in the Map
#1 Select the Country – You can choose which country to display in the map as shown below –
$(function () {
            $(".mapcontainer").mapael({
                map: {

                    /* Select the Country you want to display map of */
                    name: "france_departments"
                    }
});
});
Conclusion
In this blog, we have learned how to use the jQuery Mapael library to create realistic and interactive maps for your website. With its wide range of features and easy-to-use syntax, jQuery Mapael is a great tool for creating maps. You can explore more features and settings on the library’s official website and create stunning maps for your next project. Happy mapping!