
Introduction
Contact form 7 is simple yet popular WordPress plugin for making contact forms. Many developers take it lightly like you did.
The internet is full of millions of websites, You know. But Do You Know what they all have in Common? Right! a Contact Form.
Contact form is a Mandatory component for each website. Whether it be a commenting form, subscription form or a contact form.
Well in this article, we’ll be talking about one of this leading contact form plugin. And You will learn how you can create not only beautiful contact forms with it, but also how to use it like a pro.
What is Contact form 7 WordPress Plugin?
Like any other contact form plugin, contact form 7 is also a plugin to add contact form to your WordPress website. Loaded with all the essential components, it its available to download for free.
What Separates it from other plugins is its complex simplicity. It is really slightly complex.
How it works?
To make a contact form using contact form 7, all you need to do is install and activate this WordPress plugin, which I’m sure you already did. Then you get a general contact form created by default under the contact menu in WordPress dashboard.
You can just copy the shortcode, and paste it wherever you want to use this form.
Okay! but that’s not all you have.
How to customize the contact form
You can create a new form or modify this default form available here. You got all the form fields in the top menu. When You click any one of them, and a shortcode is added in the code.
Contact form 7 Advanced
Besides the basics, You can dig deeper into it, if you want. Here are some advanced things you can try with it-
Export Form Entries to Excel File
When someone submits the form, you get an email with the form data. Apart from that You can also export the form entries to an excel file.

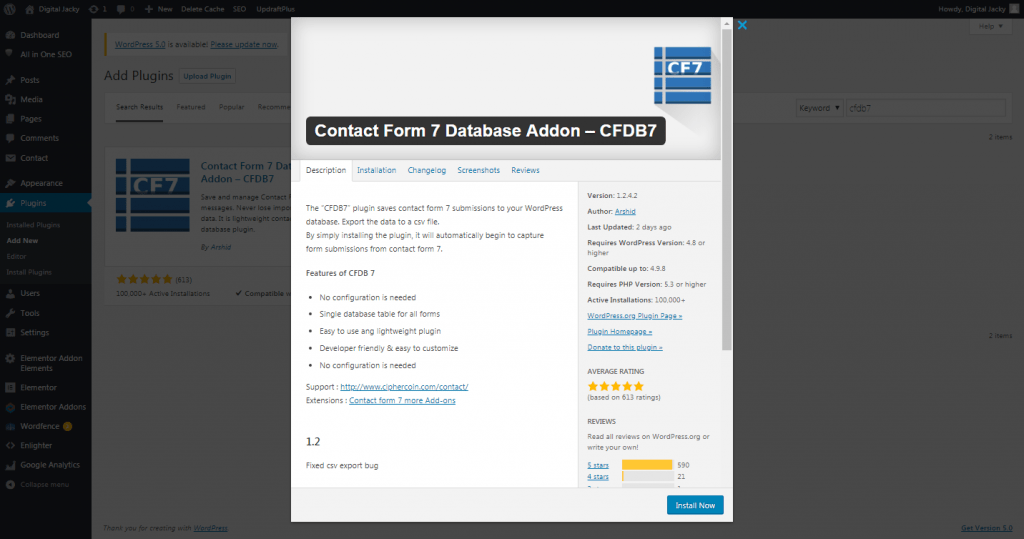
All you have to do is install this plugin called Contact form 7 database addon. Just activate it, and you get all the data in a tabular form. If you wish you can export the data into CSV format, which is similar to excel spreadsheets.
Do You Know? You Can Make Your Own Bulk Url Shortener with Bitly
Using Conditional Fields in Contact form 7
Conditional fields– Input fields in a form When you want to make logical forms that changes with user input.

For Example, suppose you want some fields to appear only when user select a particular option.
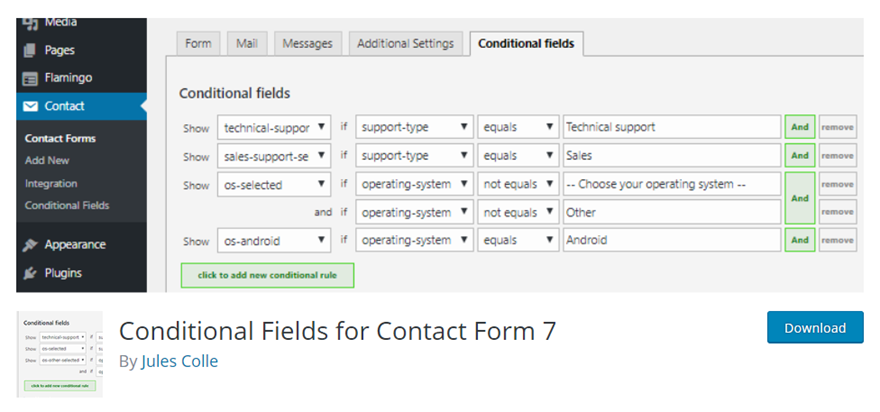
Install and activate the plugin called Contact Form 7 Conditional Fields.
Now, You’ll see a new tab of conditional fields is added in the form menu.
You need to create form groups and then, select which Form Group to show based on the value of the conditional input field.
So, add a form group in the form. Then put all the fields you want to show only if the condition is true.

After saving, go to the conditional fields column and select show this if this equal this.
It’s that simple !
Adding hidden input fields
Do you remember, hidden fields you learned while you were taking HTML classes. You can add hidden input fields in contact form 7. Just like the example below-
[hidden your-email default:user_email "example@example.com"]


