Table of Contents
Introduction
Vtiger is one of the most widely used CRM globally. It comes with a bunch of Features like Project Management, Inventory Management & a lot of other CRM Modules.
What are VTiger Webservices
Also known as VTiger REST API, VTiger Webservices is an advanced feature to interact with VTiger CRM programmatically
To add automation & extend the capabilities, VTiger comes with a powerful Restful API.
Prerequisites for Using VTiger REST API
- A running instance of VTiger Community Edition
- Secret Accesskey (Can be found in VTiger Dashboard)
- Basic understanding of sending GET & POST Requests
Step 1 – Get Temporary Access Token
To start with VTiger REST API, the first thing we need to do is obtain an Access Token using the username.
To do that, we need to send a GET Request as mentioned below
<VTIGER CRM URL>/webservice.php?operation=getchallenge&username=<USERNAME> Response
{
   "success":true,
   "result":{
        "token":"641f17b6374f2",
        "serverTime":1679759286,
        "expireTime":1679759586
        }
}
Step 2 – Obtain Session Id using Encrypted Access Key
Now we have the access token, next, we need a Session ID.
To obtain the session ID, follow these steps –
How to get the User Access key from VTiger Dashboard
Step 3 – Run Operations using VTiger REST API
Describe Operation – To get details of any Module
A simple Describe operation looks like this –
GET <VTIGER URL>/webservice.php

Required Parameters
username=<USERNAME>
operation=describe
elementType=moduleName //Leads | Contacts | Accounts etc
Create Operation – To create Records in VTiger CRM using REST API
POST <VTIGER URL>/webservice.php?operation=create&elementType=moduleName&element=convert_into_json_string ({field1: value1, field2=value2})
Step1 – Include the Vtiger REST Class PHP code
We’ll use the VTiger Rest Class for running operations via REST API
Create a file named Vtiger_REST_Class.php and insert the following code into it –
Step2 – Authentication using accesskey
Obtain the Accesskey as shown below –


Now create an index.php file and add the following code to it –
<?php
require_once("Vtiger_REST_Class.php");

// CRM URL
$url = "{Your Vtiger App URL}/webservice.php";

$username = 'admin';


$accessKey = '{Access key from the preferences menu}';

$wsC = new WS_Curl_Class($url, $username, $accessKey);

if (!$wsC->login()) {
   echo $wsC->errorMsg;
}else {
    echo 'login successful';
}
Once you’ve logged in successfully, you can run CURD operations in Vtiger.
Step3 – Running CURD Operations in VTiger REST API
#1 ListTypes Operation – To get the Modules which can be accessed using the webservice API.

This will output the following details –

#2 Get all fields of a Model using the describe Operation
$describe = $wsC->operation(“describe”, array(“elementType” => “Accounts”), “GET”);

This will output the following results –

#3 Create Records in a Model using Vtiger REST API –
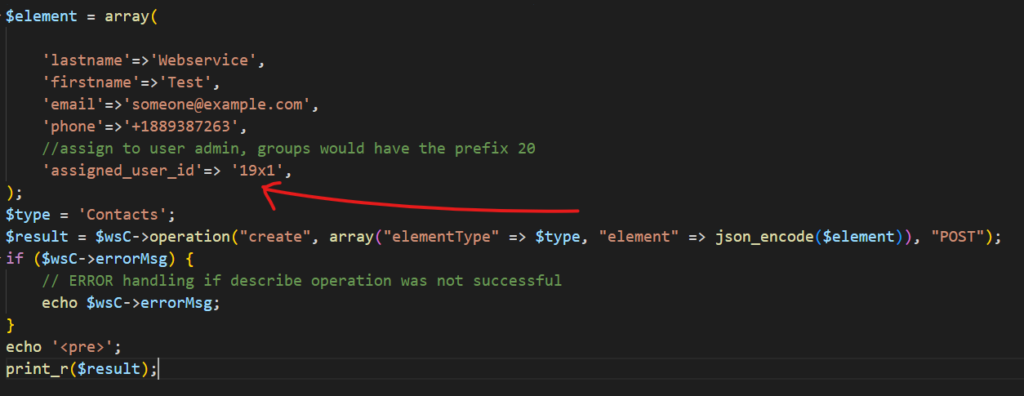
$result = $wsC->operation(“create”, array(“elementType” => $type, “element” => json_encode($element)), “POST”);
You can run the Create Operation as shown in below screenshot

Please note – Ids of a model are written as {model_id}x{record_id}. That is why the value of assigned_user_id is passed 19×1 because 19 is the model_id of users model.
Also, make sure to provide the values of mandatory fields for the create method to run successfully.
This will create records in the Contacts model as shown below

#4 Read Records
$Contact_Details = $wsC->operation(“retrieve”, array(“id” => ’12×115′), “GET”);


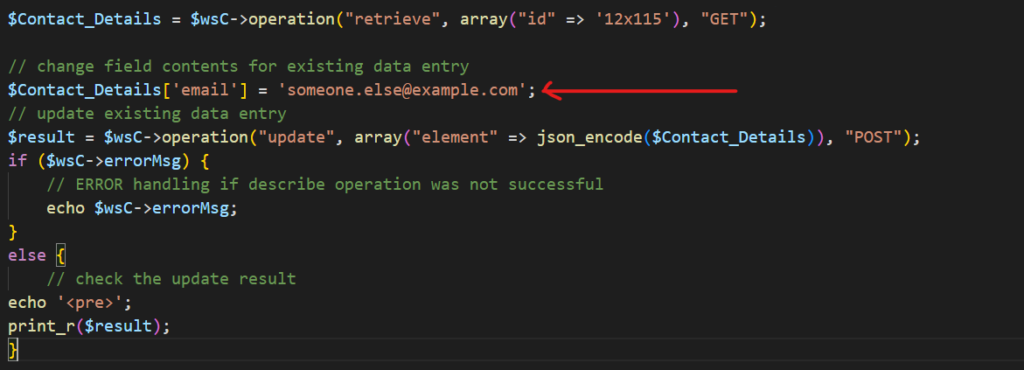
#5 Update Records
$Contact_Details = $wsC->operation(“retrieve”, array(“id” => ’12×115′), “GET”);
$Contact_Details[’email’] = ‘someone.else@example.com’;
$result = $wsC->operation(“update”, array(“element” => json_encode($Contact_Details)), “POST”);


#6 Delete Records
$result = $wsC->operation(“delete”, array(“id” => {record_id}), “POST”);


👏 Congratulations, You did it!!

You May Also Like –
Reference Links
https://help.vtiger.com/article/147111249-Rest-API-Manual
https://community.vtiger.com/help/vtigercrm/developers/third-party-app-integration.html


